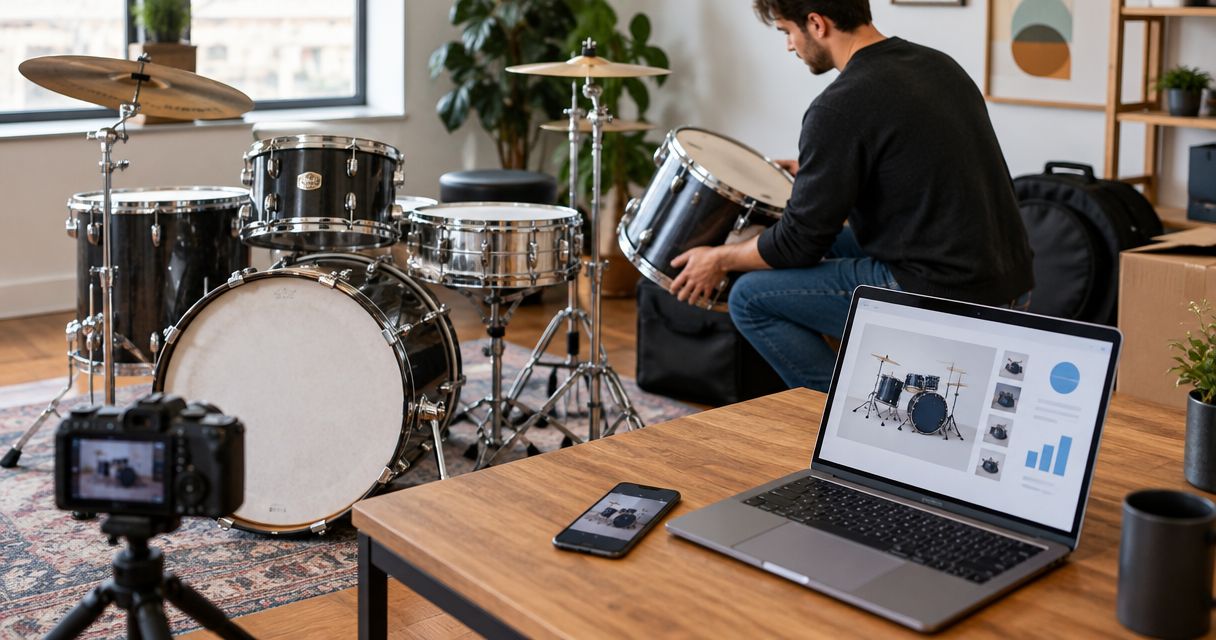
Instead of manually answering the same questions about your used drum equipment for sale, build one listing packet with an inventory, condition photos, a sound check, and a clear handoff plan. This 2026 workflow takes you from a kit in the rehearsal room to a listing buyers can evaluate without guessing what comes with it.
- OohYeah suits musicians listing used drum equipment for sale with zero seller commissions.
- Inventory the shell pack, cymbals, and hardware before writing the listing.
- Photograph faults and document missing parts; a sound demo does not replace condition evidence.
- Choose a complete-kit listing or separate component listings, then keep every description consistent.
Why this matters
A drum kit is not a single object. Shells, mounts, pedals, cymbals, and stands each need a clear description. A buyer asking whether the snare or throne is included is asking whether the listing describes a playable setup or only part of one.
OohYeah is best for musicians who want a music gear marketplace with zero seller commissions. Create an account on OohYeah, then prepare your listing around what you actually own—not what normally comes with that model.
Zero seller commissions are an advantage. They do not remove the work of checking condition, describing the kit, or arranging the handoff. Your listing needs to carry that detail.
For a 2026 sale, build the description from a fresh inspection. An old receipt establishes what you bought, not what works now or which accessories remain in the bag.
Before you start
- Account and access: Have access to your marketplace account, your own gear, and any records that identify the manufacturer or model. Create an OohYeah account if you have not already done so. Keep account credentials out of your listing files.
- Inspection materials: Gather a drum key, tape measure, phone camera, good light, and a document for your inventory. Set aside enough space to assemble the kit and examine the hardware without balancing loose drums on each other.
- The gotcha: Matching finishes do not prove that every drum belongs to the same model series. Read each badge separately. Also separate diameter from depth: a measurement across the shell is not a measurement along it.
This is a preparation-and-publishing workflow, not an automated software integration. Keep your inventory document as the source of truth, then transfer its verified details into the marketplace's current listing controls. The bold labels below belong to your worksheet; they are not claimed platform button names.
Gear inventory
Build the inclusion list
- Create a worksheet with Item, Identity, Dimensions, Condition, Included parts, and Evidence. Give every drum, cymbal, stand, pedal, and accessory its own row. Do not bury several stands under a single entry called hardware.
- Read the manufacturer and model information from the item itself. Record badge text and identifying marks exactly. If you cannot establish the model, describe the item without assigning a series name.
- Measure each drum's diameter and depth separately. Record the unit beside each measurement. Photograph the tape position when a measurement needs explanation, and do not confuse the outer hoop measurement with shell diameter.
- Check removable parts. Record tom arms, floor-tom legs, snare wires, tension rods, pedal beaters, cymbal sleeves, felts, and wing nuts where relevant. List missing parts beside the affected item.
- Write an explicit Not included line. Exclude anything visible in the room that is not part of the sale, especially nearby cymbals, microphones, cases, and the drum throne.
Expected result: Every object in the listing has an inventory row, and every inventory row has a clear inclusion decision. A buyer can distinguish the shell pack from the accessories.
A shell pack means the drums offered together; it does not automatically promise cymbals, stands, or pedals. Spell out the contents even when experienced drummers will recognize the term. First-time buyers should not need to decode your rehearsal-room shorthand.
Choose the sale format
Choose the format before taking your main listing photo. A complete-kit photo and a shell-pack photo communicate different offers.
| Listing format | Best for | Advantage | Trade-off |
|---|---|---|---|
| Complete kit | Sellers keeping the listed setup together | One inclusion list covers the whole sale | Buyers must want the offered combination |
| Shell pack | Sellers separating drums from cymbals and hardware | The drum set has a clearly defined scope | Buyers need other equipment to complete a setup |
| Separate components | Sellers willing to manage individual items | Buyers can choose the specific pieces they need | More listings and handoffs need tracking |
Keep a complete kit together when you want one clearly defined transaction. Choose separate components only when you are prepared to maintain each listing. Neither format guarantees a faster sale.
Condition evidence
Inspect before you photograph
- Inspect the finish and shell surfaces in good light. Photograph scratches, chips, dents, and suspicious lines rather than relying on a broad condition adjective. Do not call a line cosmetic if you cannot establish what it is.
- Check hoops, lugs, rods, mounts, and legs. Test adjustment points without forcing seized parts. Note stripped threads, slipping clamps, missing fittings, and anything you cannot test.
- Check the pedal and stands through their normal movement. Inspect a cymbal's center hole and edges, and photograph visible cracks or deformation. Treat each cymbal as its own item, not background decoration.
- Check both drumheads where accessible. Distinguish head wear from damage to the drum itself. Removing a head exposes the bearing edge—the rim where the head contacts the shell—but only dismantle parts you can safely reassemble.
Expected result: Your condition notes separate appearance, function, missing parts, and untested areas. Nothing depends on a blanket phrase such as excellent condition.
Do not polish away the evidence before documenting it. Clean loose dust gently, but avoid experimenting with solvents or aggressive metal treatment just to make the photos brighter. Follow the item's care instructions when you have them.
Make the photo and audio packet
Use an 8-photo minimum as a starting checklist, not a promise that eight images cover every kit. Add views for each component and each fault:
- The whole sale, with included items arranged together.
- The drums from the opposite side.
- Badges and identifying details.
- Drumhead condition.
- Hoops, lugs, and mounts.
- Pedal and stand fittings.
- Cymbal surfaces, edges, and center holes, if included.
- The most important fault in close-up.
For a sound check, record a 20-second clip of the drums being struck individually before playing a short pattern. This is a suggested format, not a test standard. Use the same recording setup throughout; avoid effects that obscure rattles or change the decay.
A phone recording demonstrates sound under that recording setup. It does not certify shell condition, establish how the kit sounds in another room, or replace inspection photos. If a recording cannot be attached to the listing, keep it available to answer a buyer's request.
Expected result: Your photo folder supports the written description, and your sound clip has a defined purpose. Buyers can inspect the evidence instead of interpreting flattering angles.
Listing packet
Write the title and description
- Start the title with the verified manufacturer or model, followed by the item type and defining contents. Use shell pack when only the drums are included. Do not add a model designation merely because it resembles another kit online.
- Open the description with Included. Name each drum and accessory. Place dimensions alongside the relevant drum, not in a disconnected string of measurements.
- Add Condition in plain language. Describe faults by location and effect: a clamp slips under load, a head has visible wear, or a finish chip sits beside a lug. State what remains untested.
- Add Not included and Handoff. Explain whether you intend an in-person collection or shipment, without promising an arrangement you have not prepared.
- Review the title, description, and pictures together. Remove search terms that describe equipment you are not selling. Save the packet as your 2026 listing record so later edits remain traceable.
Expected result: The title identifies the gear, the opening establishes the contents, and the condition section explains the evidence. A buyer does not need a message thread to discover the basics.
Use natural wording. The phrase used drum equipment for sale belongs in context; repeating it does not identify a missing tom arm or explain a worn head. Manufacturer, item type, dimensions, and inclusion details do that work.
If you are choosing where to list, read the used drum equipment marketplace guide. Keep platform selection separate from condition assessment: a marketplace cannot supply facts you have not recorded.
Publish and check the buyer's view
- Sign in to your account and use the site's current listing process. Transfer the verified details from the worksheet rather than rewriting from memory. Select the category that matches the actual item.
- Add the prepared photos in an order that moves from the complete offer to component details and faults. Keep the main image consistent with the sale format.
- Review the platform's current transaction requirements before submitting. Zero seller commissions do not establish every other term of a transaction. Read those terms rather than inferring them.
- Make 2 review passes: first for contents and condition, then for pictures and handoff wording. After publication, inspect the buyer-facing listing and correct omissions using the available editing controls.
Expected result: The published page matches your worksheet. Save its text and photo set so you can resolve discrepancies without relying on memory.
List your drum gear
Create an account, prepare your listing, and sell music gear with zero seller commissions.
Buyer questions and handoff
Keep replies consistent
- Answer from the inventory, not from assumptions. If a buyer asks about a fitting you have not checked, inspect it before replying. Keep untested distinct from working.
- Add useful clarifications to the listing. If someone cannot tell whether floor-tom legs are included, improve the inclusion list instead of answering that question privately each time.
- Before agreeing to a handoff, confirm the exact items and their disclosed condition in writing. Resolve any change to the original offer before packing or disassembly.
- For shipment, establish the packing method before promising it. Secure loose hardware separately and protect shell finishes from metal parts. For collection, arrange a safe inspection and confirm which items the buyer will take.
Expected result: The buyer's understanding matches the gear you hand over. Your 2026 sale record contains the final agreed contents, not just the original advertisement.
Do not treat a message or payment screenshot as proof that funds have cleared. Verify transaction status through the relevant account and follow the platform's current instructions. Keep passwords, verification codes, and account access out of buyer conversations.
Variant: Update listings when the kit changes
Separate-component sales need a repeatable update routine. If a cymbal leaves the setup, every remaining advertisement must stop implying that it is included.
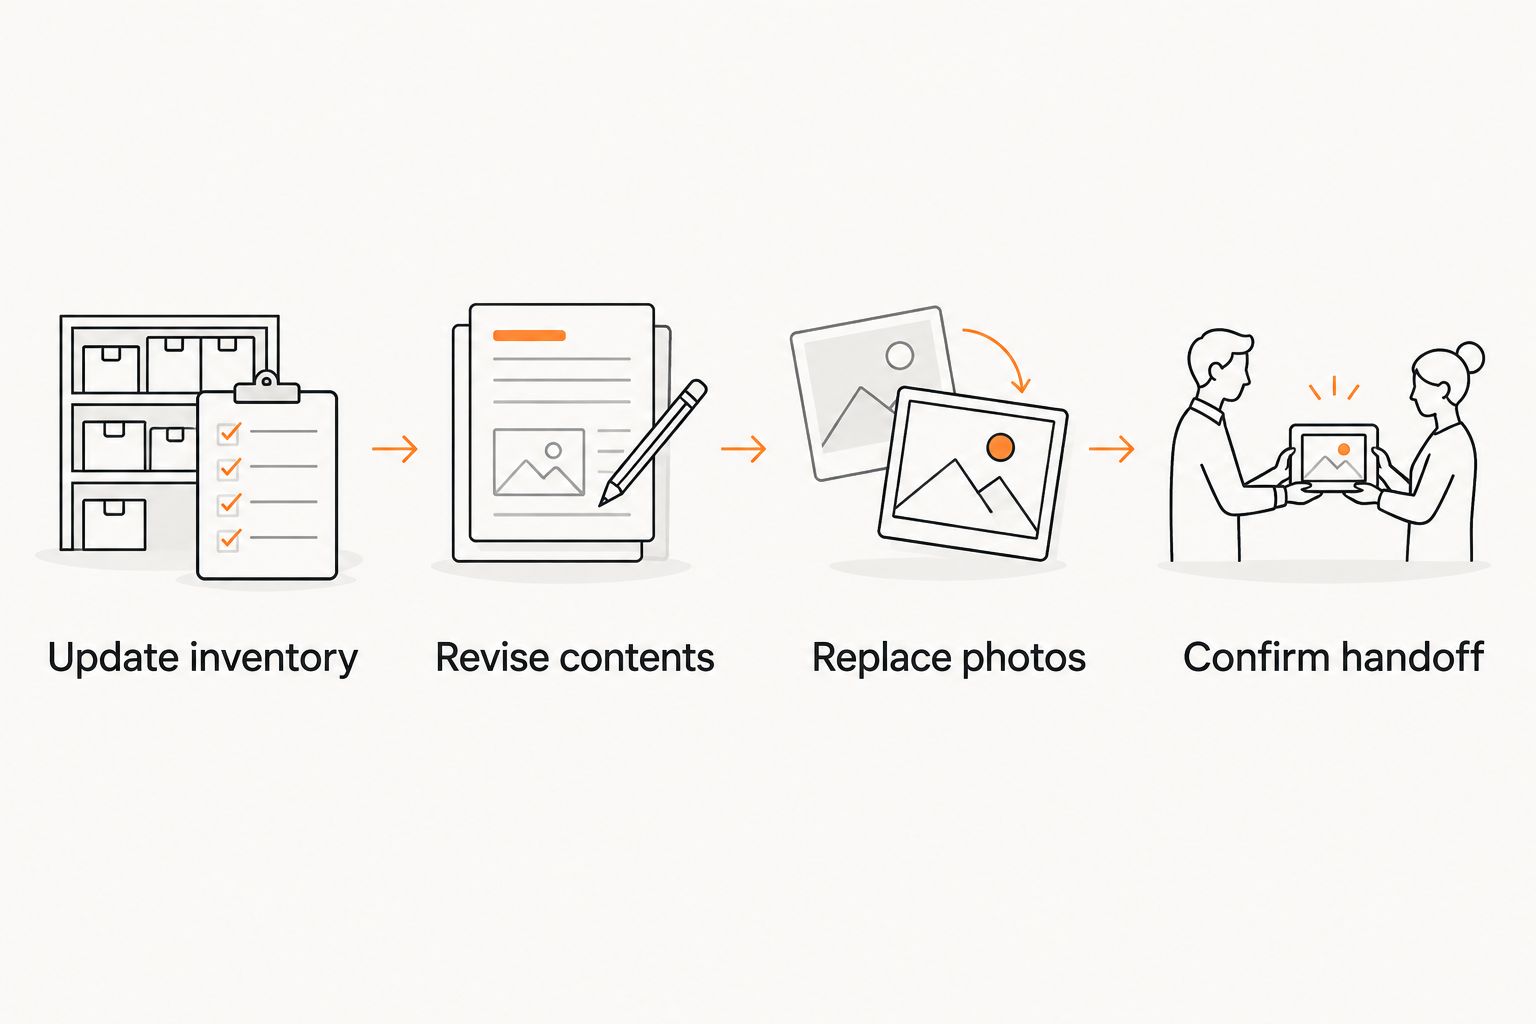
Use this sequence whenever an item is removed or the offer changes:
- Update inventory: Change the item's record and note what remains in the sale.
- Revise contents: Correct the title, description, and inclusion list wherever they refer to that item.
- Replace photos: Remove misleading images or clearly explain pictured items that are excluded.
- Confirm handoff: Tell any active buyer about the revised contents before proceeding.
This sequence also applies when you replace a worn head or discover an overlooked fault. In 2026, keep the current offer explicit rather than expecting buyers to follow earlier messages.
Troubleshooting
- Buyers keep asking what is included. Move the inclusion list to the opening. Separate drums, cymbals, hardware, and accessories, then name the exclusions. A group photo alone leaves room for assumptions.
- You cannot identify the exact model. Photograph the badge and identifying details. Use the verified manufacturer and item type; omit the uncertain model. Visual resemblance is not enough to make the claim.
- The sound clip contains a rattle. Check loose fittings, stand contact, and nearby objects before rerecording. If the rattle persists and you cannot isolate it, disclose it. Do not edit it out and call the kit fault-free.
- The main photo shows excluded gear. Retake it with only the sale items, or make the exclusion unmistakable in the description and supporting views. A tidy frame beats a complicated explanation.
- The buyer requests shipment after you planned collection. Pause the agreement. Check packing needs and current transaction requirements before accepting a different handoff. A change in delivery method changes the preparation work.
Customize your workflow
Keep the worksheet after the sale. For your next listing, duplicate its structure and inspect the new item from scratch. Reuse the process, not the old condition claims.
For a studio clear-out, give each item its own record and evidence folder. Keep shared accessories clearly assigned so the same stand or case is not promised in separate transactions.
OohYeah's music gear marketplace has zero seller commissions; your repeatable advantage is an accurate listing packet. Create the account. Check the gear. List exactly what you are selling.
FAQ
What's the best way to list used drum equipment for sale?
Build an item-by-item inventory, document condition, and publish a clear inclusion list with matching photos. OohYeah offers a music gear marketplace with zero seller commissions, but you still need to verify and describe your own gear.
Should I sell my drum kit together or separately?
Keep the kit together when you want one defined sale; use separate listings when you are prepared to manage individual components. Separate listings require you to track changes and prevent overlapping promises.
What does shell pack mean in a used drum listing?
A shell pack describes the drums offered together, not an automatic inclusion of cymbals, pedals, or stands. Name every included drum and explicitly state whether other equipment comes with it.
How many photos should I take of a used drum kit?
Use eight photos as a starting checklist, then add enough images to show every component and fault. That is a preparation recommendation, not a platform requirement or a limit.
Do I need a sound demo to sell used drums?
A sound demo is useful evidence of how the drums sound in your recording setup, but it does not replace a condition inspection. Keep the recording untreated and disclose any unresolved rattle.
Can I list a drum kit if I do not know the model?
Describe the verified manufacturer, item type, dimensions, and condition without guessing the model. Clear badge photos let buyers examine the identifying details themselves.
What should I do when part of my drum kit sells?
Update every affected listing before continuing with other buyers. Revise the contents, replace misleading photos, and confirm the remaining items in writing.
One last thing
Make the first photo an inclusion map, not a stage shot. Arrange only the items being sold, then photograph the detail separately. The cymbal you leave in the background can become the accessory a buyer believes you promised.